Chapter 1: Create our User Interface
For this demo, we assume you already have an anvil.works account.
A Short Introduction
Let’s start by logging into anvil.works and creating a new application by selecting “Blank App” > “Tableau Extension”:

Your brand-new app will look like this:

On the left side we have the app browser which we can use to switch between different parts of our app. In the center we have the form editor where we will add our UI elements. We are looking at the design view right now. The form editor also has a code view where we will create our Python class for the form later. On the right we have the toolbox where we will pick new components to add to the UI.
Click this link to the read a more in depth explanation of the Anvil Editor
Add a Dependency
For our application to work, we need to add the trexjacket dependency to our app.
To add a dependency, we go to Settings > Dependencies and add the following third party token: 4WJSBYGUAK63RAJO
Create our First Form
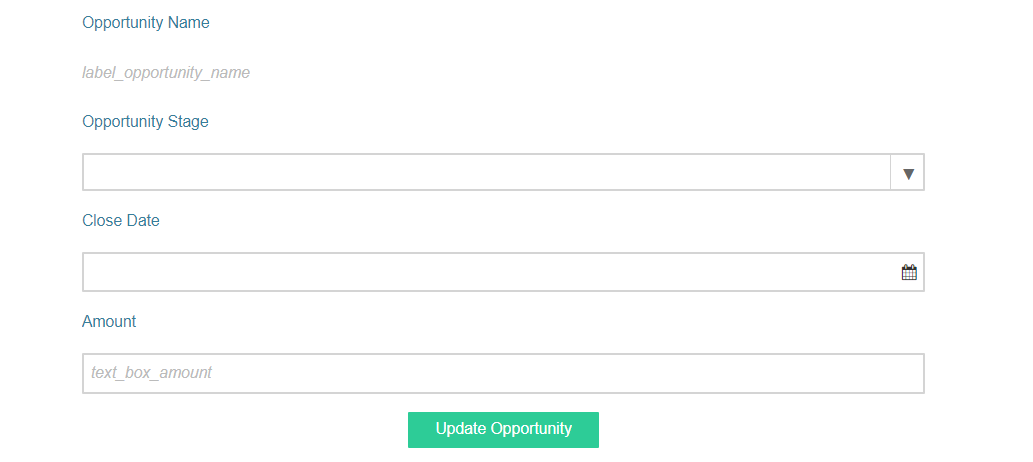
Our app will have single form with the following elements (stacked in a single vertical column):
Label_1text: “Opportunity Name”Label_2name:self.label_opportunity_nameLabel_3text: “Opportunity Stage”DropDown_1self.drop_down_opportunity_stageLabel_4 text: “Close Date”DatePicker_1name:self.date_picker_close_dateLabel_5text “Amount”TextBox_1name:self.text_box_amountButton_1name:self.button_update_opportunity, text: “Update Opportunity”click event bound to
button_update_opportunity_click
Feel free to style your form as you like. We also chose to change the standard labels appearance to blue and the button role to primary to help differentiate them from the other elements. When you are all finished, your form should look something like this.