Chapter 5: Adding new comments
In the previous chapter we saved information about the user’s selection. In this chapter we’ll build the front end that allows users to create their comments.
Step 1: Getting comment info
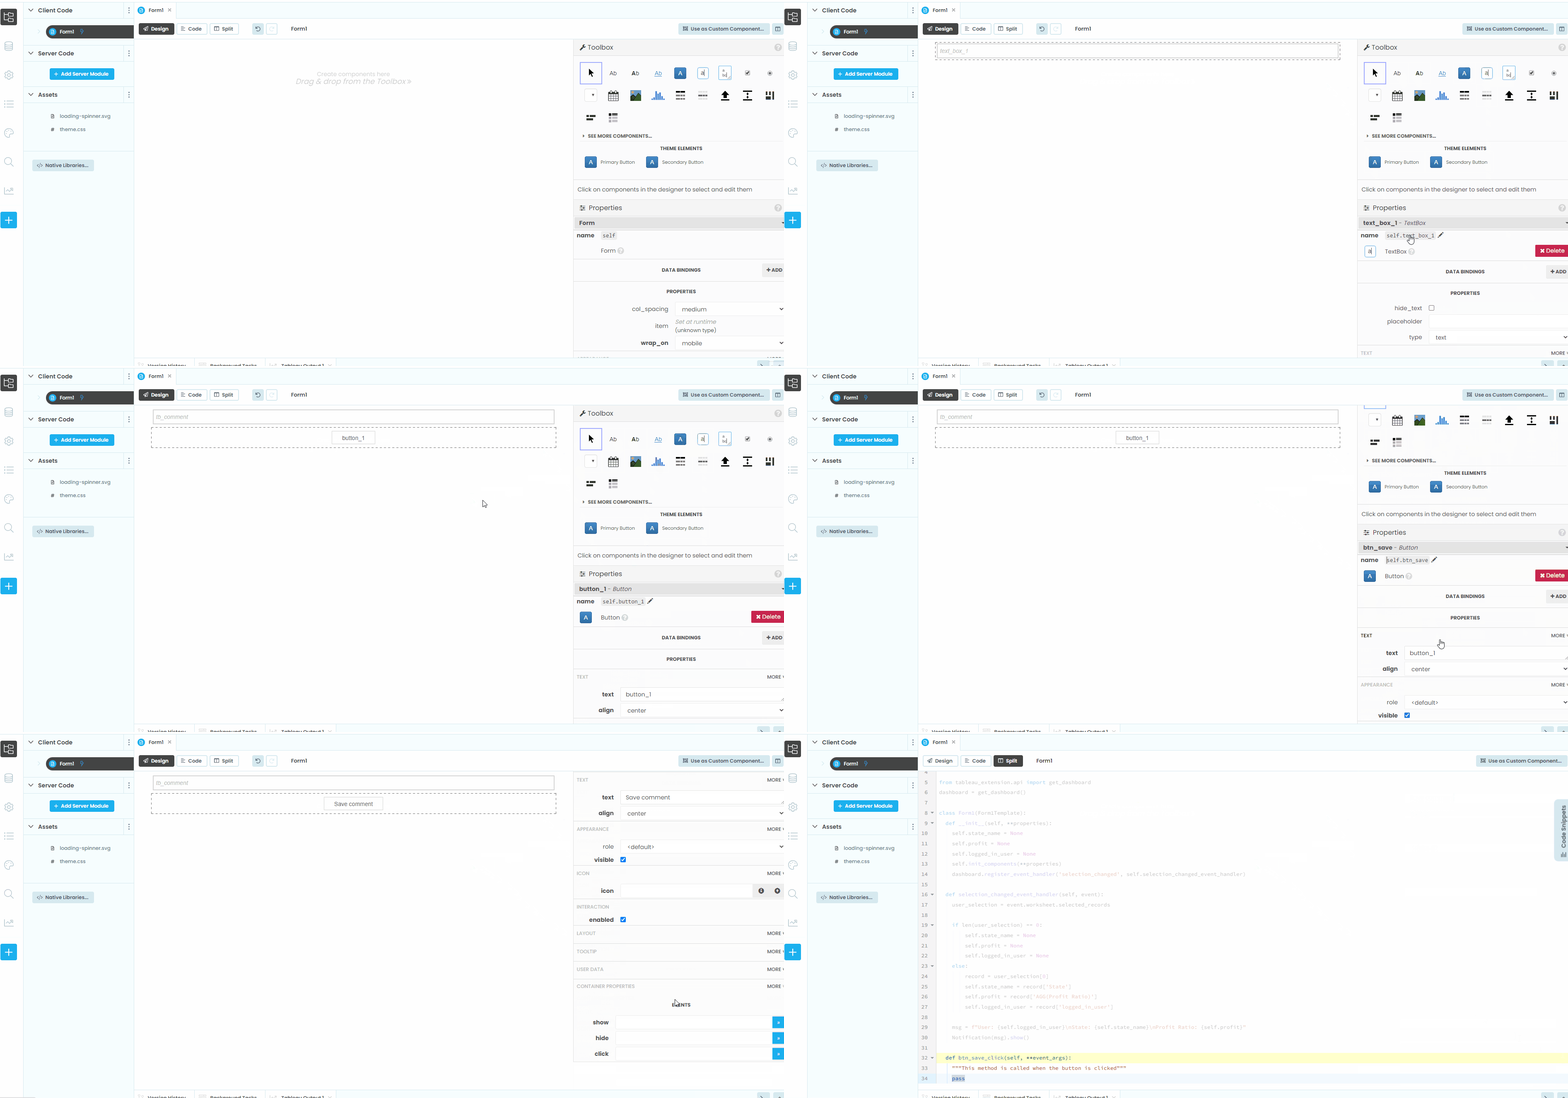
Let’s start by adding a text box and button component to our form.

In the gif above, we add:
A Button, called
btn_save, with its click event bound to thebtn_save_clickmethodNote that we need to scroll down and click “>>” to create the
btn_save_clickmethod. Now, whenever a user clicks that button,btn_save_clickis called.
A TextBox, called
tb_comment
Let’s open the btn_save_click method and add some code that shows what the user commented, along with the selection information we configured in the previous chapter. We can access the content of the text box using its text attribute: It will also be useful to know when a comment was made, so let’s import the datetime module at the top of Main s code.
 1from ._anvil_designer import MainTemplate
 2from anvil import *
 3from anvil.tables import app_tables
 4from anvil import tableau
 5
 6from trexjacket.api import get_dashboard
 7dashboard = get_dashboard()
 8
 9from datetime import datetime
10
11# rest of Main code omitted
and add some code to the btn_save_click method that was created:
def btn_save_click(self, **event_args):
    comment_info = {
        'user': self.logged_in_user,
        'comment': self.tb_comment.text,
        'id': self.state_name,
        'value': self.profit,
        'at': datetime.now()
    }
    Notification(str(comment_info)).show()
    self.tb_comment.text = ""
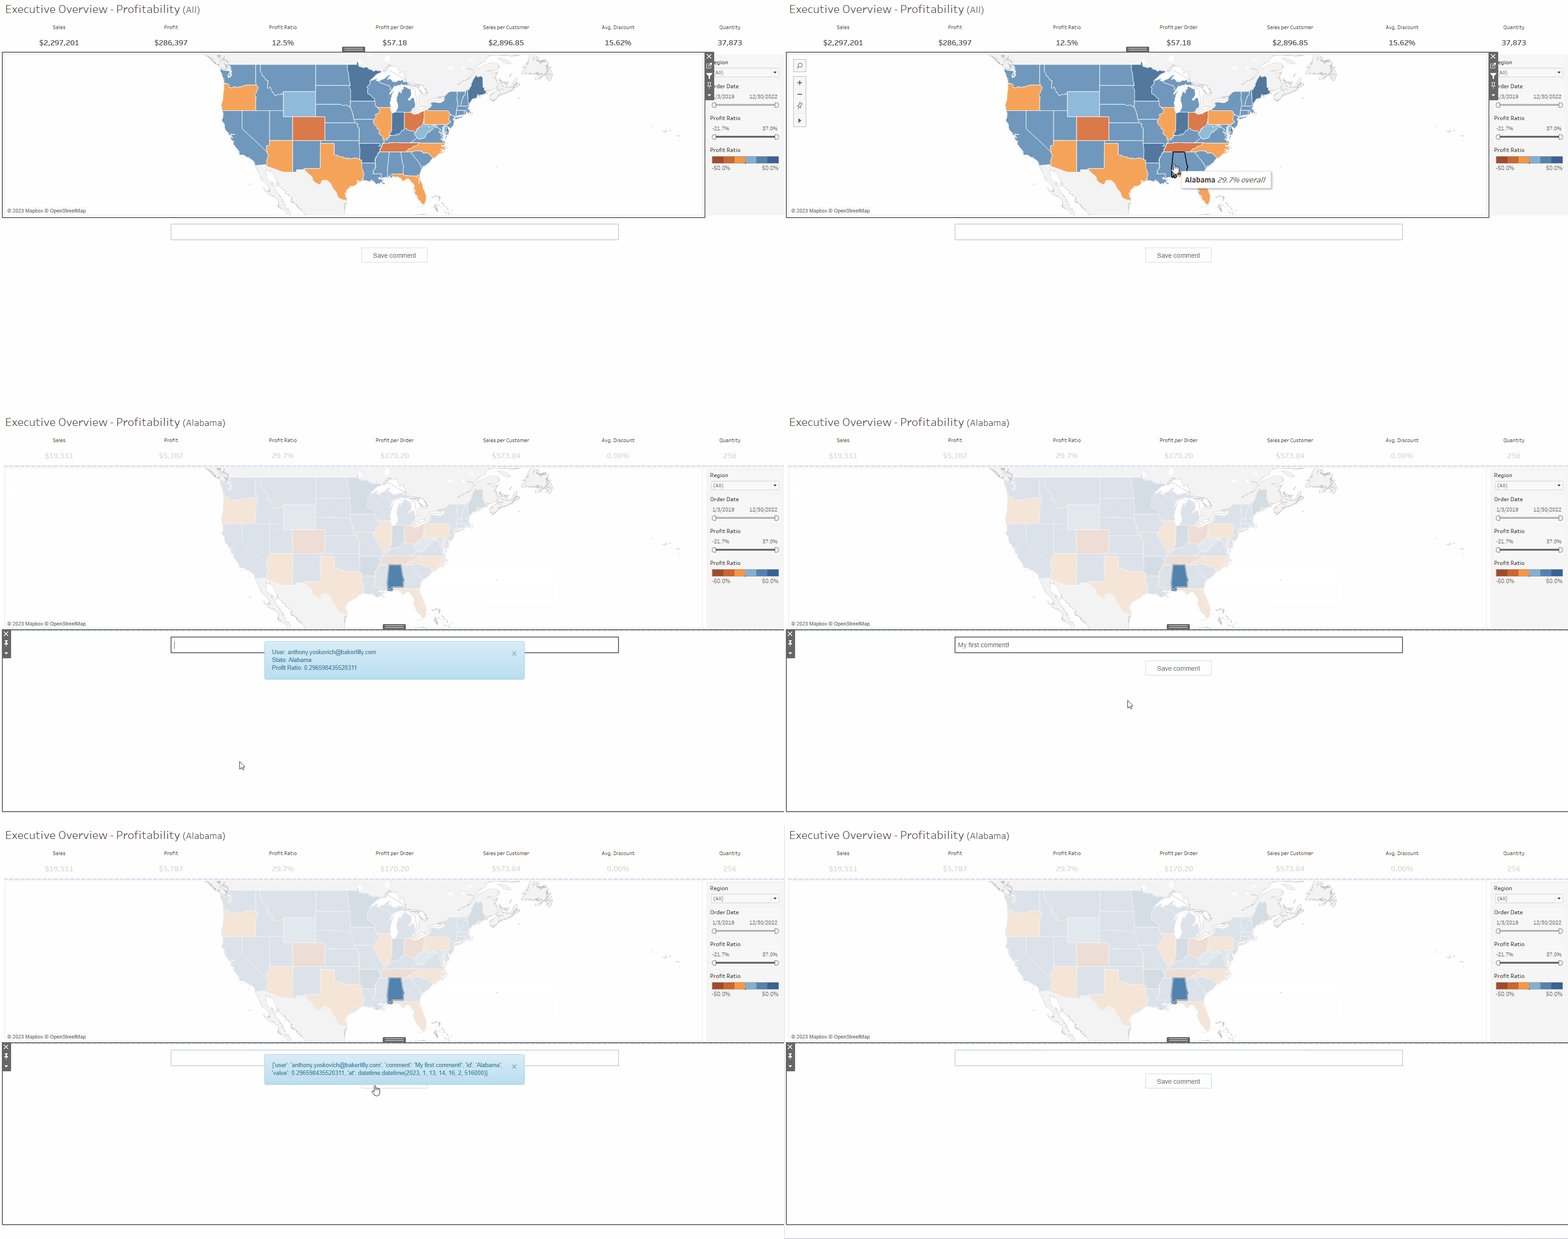
Reload your extension and add a comment to the text box, then click “Save comment”. You should see a popup that contains comment_info!

Step 2: Saving to a data table
Now we have a way to capture what the user has commented, but we need a way to save these comments when a user leaves the extension. We can use Anvil Data Tables for this!

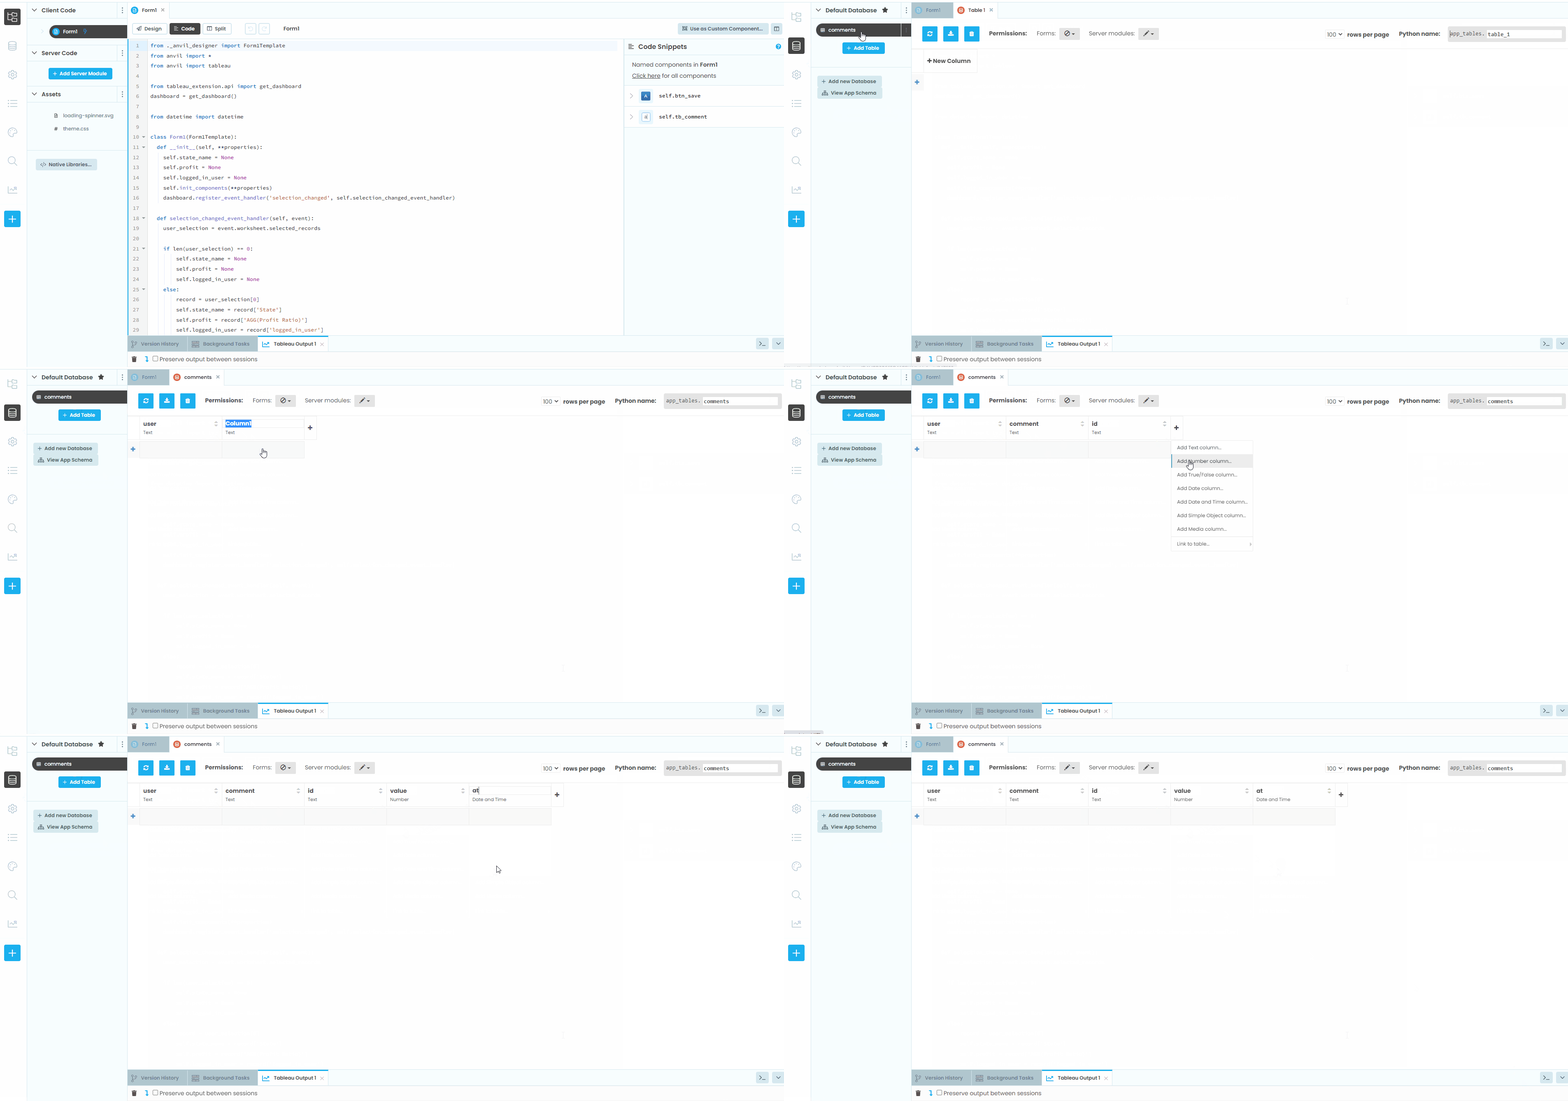
In Anvil, select the “Data” icon on the left hand side and then click “Add New Table”. Create a table named comments with the following columns:
user:
Textcomment:
Textid:
Textvalue:
Numberat:
Date and Time
Additionally, be sure to select the “Can search, edit, and delete” option under the Form permission.
Warning
You’d never allow forms to search / edit/ and delete from a datatable in a production application, but for the sake of the tutorial we’ll do that for now.
Now that we’ve created a datatable, let’s modify btn_save_click to write to our datatable instead of just showing the comment information:
def btn_save_click(self, **event_args):
    app_tables.comments.add_row(
        user=self.logged_in_user,
        comment=self.tb_comment.text,
        id=self.state_name,
        value=self.profit,
        at=datetime.now()
    )
    self.tb_comment.text = ""
At this point, selecting a state and adding a comment should start populating the comments datatable! In the next chapter we’ll build the UI to show what comments have already been made.
Click to view the full code for Main
 1from ._anvil_designer import MainTemplate
 2from anvil import *
 3from anvil.tables import app_tables
 4import anvil.tables.query as q
 5from anvil import tableau
 6
 7from trexjacket.api import get_dashboard
 8dashboard = get_dashboard()
 9
10from datetime import datetime
11
12class Main(MainTemplate):
13  def __init__(self, **properties):
14    self.state_name = None
15    self.profit = None
16    self.logged_in_user = None
17    self.init_components(**properties)
18    dashboard.register_event_handler('selection_changed', self.selection_changed_event_handler)
19
20  def selection_changed_event_handler(self, event):
21    user_selection = event.worksheet.get_selected_marks()
22
23    if len(user_selection) == 0:
24        self.state_name = None
25        self.profit = None
26        self.logged_in_user = None
27    else:
28        record = user_selection[0]
29        self.state_name = record['State']
30        self.profit = record['AGG(Profit Ratio)']
31        self.logged_in_user = record['logged_in_user']
32
33  def btn_save_click(self, **event_args):
34    app_tables.comments.add_row(
35      user=self.logged_in_user,
36      comment=self.tb_comment.text,
37      id=self.state_name,
38      value=self.profit,
39      at=datetime.now()
40    )
41    self.tb_comment.text = ""