Chapter 5: Bind Screen Elements
To finish off our form we are going to bind the screen components to the variables we created in chapter 5. Data Bindings are a way of keeping a component’s properties in sync with the underlying data with minimal effort.
To add data bindings go to the Design view, scroll down in the right panel to the Data Bindings section of Properties, then select + Add.
Anvil Documentation on Data Bindings
Opportunity Name
For opportunity name we want to bind the opp_name variable to the text of the label_opp_name text box.
Select the label_opp_name text box, navigate to Data Bindings, select + Add to bring up a new binding.
From the new box click the drop-down next to Bind and set the value to Text.
In the To section and the variable name self.opp_name.

Opportunity Stage
For opportunity stage we want to bind the opp_stage variable to the selected value of the drop_down_stage drop-down.
Select the drop_down_stage drop-down, navigate to Data Bindings, select + Add to bring up a new binding.
From the new box click the drop-down next to Bind and set the value to Selected Value.
In the To section and the variable name self.opp_stage.

Close Date
For opportunity stage we want to bind the opp_date variable to the date of the date_picker_1 date picker.
Select the date_picker_1 date picker, navigate to Data Bindings, select + Add to bring up a new binding.
From the new box click the drop-down next to Bind and set the value to date.
In the To section and the variable name self.opp_date.

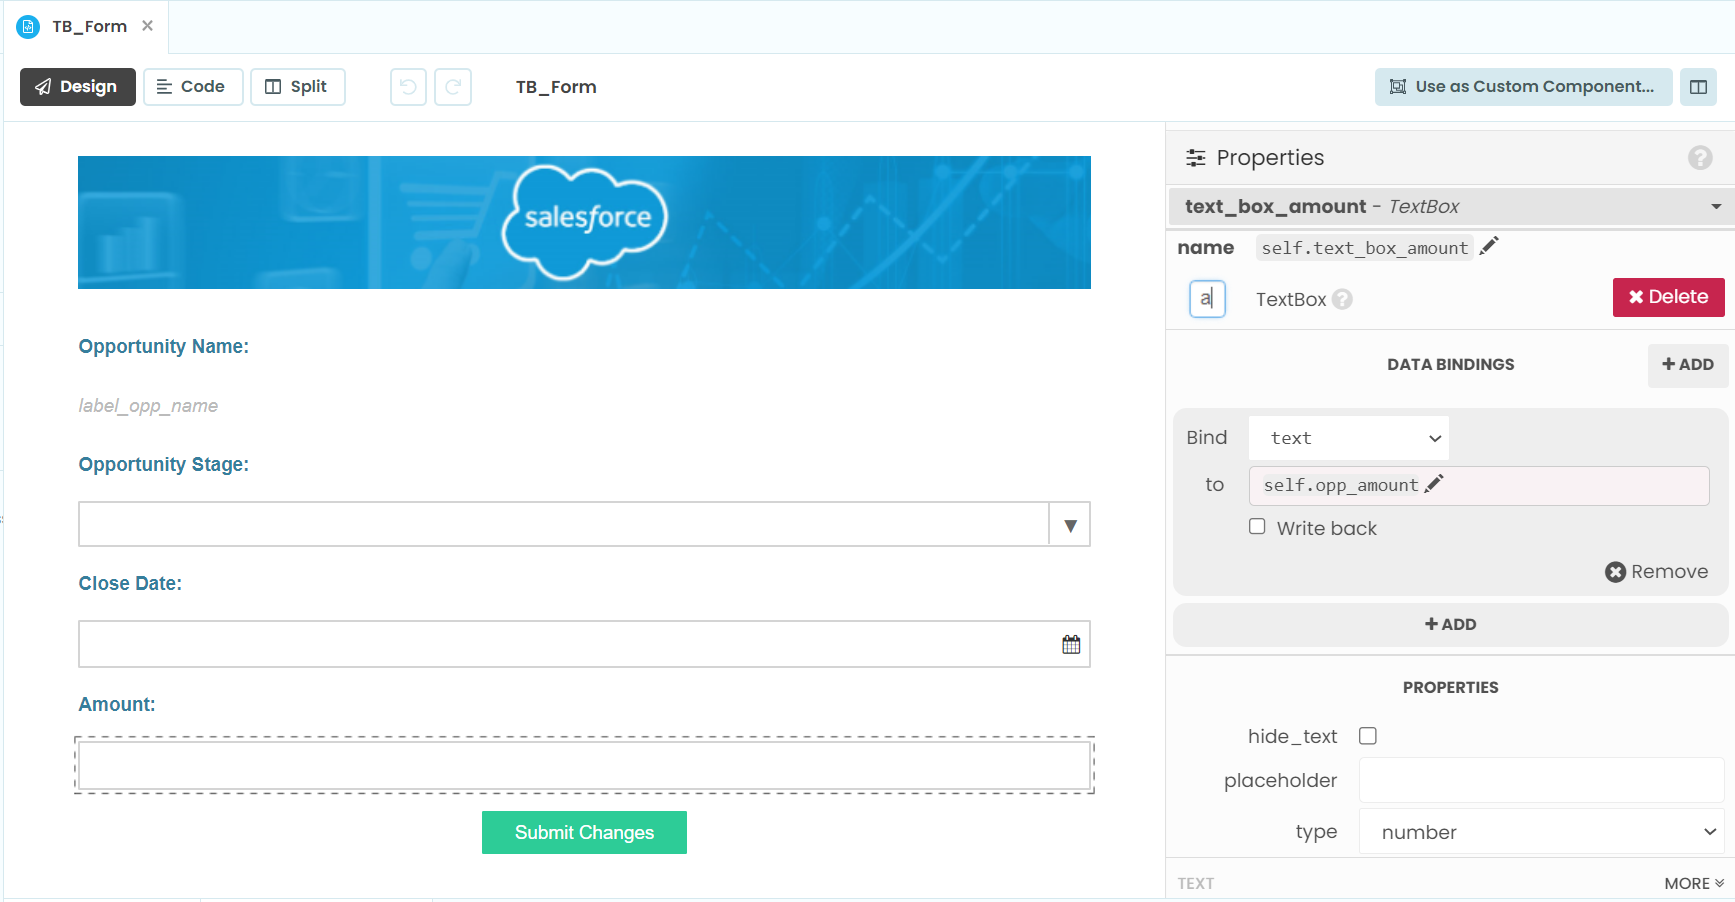
Amount
For opportunity stage we want to bind the opp_amount variable to the text of the text_box_amount text box.
Select the text_box_amount text box, navigate to Data Bindings, select + Add to bring up a new binding.
From the new box click the drop-down next to Bind and set the value to text.
In the To section and the variable name self.opp_amount.