Chapter 1: Creating A Configuration UI
For this tutorial we’ll be using 2 new pieces of trexjacket, dialogs and settings. By the end of this chapter you’ll be configuring settings in the dashboard as well as opening popup windows outside of Tableau.
Get started by downloading the starter Tableau workbook here and cloning the starter app here. After downloading both of those items, add your extension to your dashboard just like you did in Chapter 1 of the Chat Tutorial here: Chapter 1: Setting up the environment
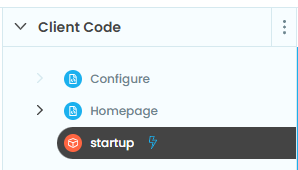
Once you’ve cloned the starter app and added your trex file, you’ll see 3 things in the Client Code section of Anvil:
A
Homepageform: This will be the main page of our extensionA
Configureform: This will be the configure page of our extensionA module named
startup(set as the startup module): We’ll use this page to define our default settings and open theHomepageform. When our extension loads, this module will run first.
Startup module
In the startup module, let’s set some default values for our settings by adding the following code:
 1from trexjacket import api, dialogs
 2
 3from .Configure import Configure
 4
 5api.get_dashboard().settings.setdefaults({
 6  "worksheet": None,
 7  "id_field": None,
 8  "override_field": None,
 9  "username": None
10})
11
12dialogs.open_start_form('Homepage')
Here we define our default values for the workbook settings as well as open our Homepage form. In order to open dialogs we must open our primary form using dialogs.open_start_form.
Homepage
In the Homepage form, add a button component named btn_configure with its “click” event handler registered to a method named btn_configure_click.
Anvil tip: Adding buttons
To add a button with Anvil, simply drag and drop the component from the Toolbox right into the form’s design pane:

When adding buttons, don’t forget to give the component a descriptive name (btn_configure above), as well as register the event handling function in the Toolbox view:

In the above example we bind the btn_configure_click method to the button’s click event. Now each time a user clicks our button, the btn_configure_click method of our form will run!
Then add the following code to Homepage (note that the btn_configure_click method here is the same method we added in the “Container properties” section of the button component!):
 1from ._anvil_designer import HomepageTemplate
 2import anvil
 3
 4from trexjacket.api import get_dashboard
 5from trexjacket import dialogs
 6
 7class Homepage(HomepageTemplate):
 8  def __init__(self, **properties):
 9    self.dashboard = get_dashboard()
10    self.init_components(**properties)
11
12  # When a user clicks the configure button, we'll use the dialogs
13  # module to open our configure form in a new window
14  def btn_configure_click(self, **event_args):
15    dialogs.show_form('configure_form', width=900, height=900)
16    self.refresh_data_bindings()
Configure
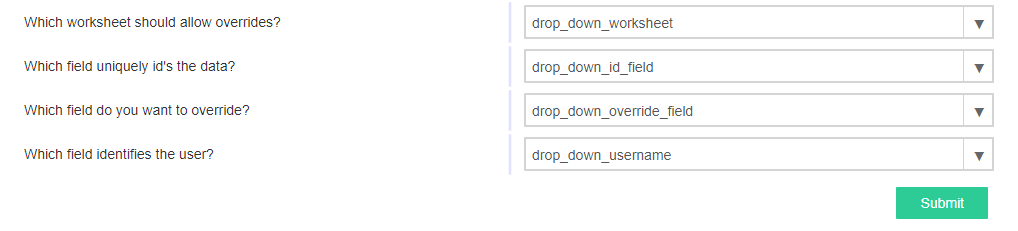
Finally, let’s set up our Configure form. Start by adding 4 labels, 4 drop down components, and a button. Once you’re done, the UI of the Configure form should look like this:
Use the table below to configure the data bindings for the drop down components (be sure to check the “writeback” and “include placeholder” option for each drop down component):
Component name |
Data binding |
|---|---|
|
|
|
|
|
|
|
|
|
|
|
|
Important!
By binding a drop down’s selected value to the keys in our dashboard settings, we can provide a quick and easy way to configure settings. Now whenever a user chooses from the drop down menu, our settings are saved! These values can be retrieved anywhere in our application using their name, just like how dictionaries work: dashboard.settings[keyname]. Settings can make your extensions configurable and extensible, allowing you to reuse extensions in different dashboards.
Now that we have our UI elements, let’s add our code to Configure:
 1from ._anvil_designer import ConfigureTemplate
 2import anvil
 3
 4from trexjacket import api, dialogs
 5
 6# In order for our Configure form to be able to be opened in
 7# a popup window we need to register it using the @dialogs.dialog_form decorator.
 8@dialogs.dialog_form('configure_form')
 9class Configure(ConfigureTemplate):
10  def __init__(self, **properties):
11    self.dashboard = api.get_dashboard()
12    self.drop_down_worksheet.items = [ws.name for ws in self.dashboard.worksheets]
13    self.show_fields()
14    self.init_components(**properties)
15
16  # Here we call self.raise_event('x-close-alert')
17  # to close the dialog window once we're done
18  def btn_submit_click(self, **event_args):
19    self.raise_event('x-close-alert')
20
21  def show_fields(self):
22    fields = []
23    if self.dashboard.settings['worksheet']:
24
25      # This is our first time accessing settings, reading the value of the 'worksheet' key to
26      # to dynamically get a worksheet from our dashboard.
27      ws = self.dashboard.get_worksheet(self.dashboard.settings['worksheet'])
28
29      records = ws.get_summary_data()
30      if not records:
31        ph = "No summary fields in worksheet!"
32      else:
33        ph = "Pick a field"
34        fields = [f for f in records[0]]
35    else:
36      ph = "Pick a worksheet first"
37
38    for dropdown in [
39      self.drop_down_id_field,
40      self.drop_down_override_field,
41      self.drop_down_username,
42    ]:
43      dropdown.placeholder = ph
44      dropdown.items = fields
45
46  def drop_down_sheet_change(self, **event_args):
47    self.show_fields()
Important!
Notice that the string we passed to @dialogs.dialog_form is the string we used in our Homepage form to open our dialog box.
Summary
Now that we’ve configured our forms, clicking the “Configure” inside our extension should open a popup window like the one below:

Go ahead and open the configure form of your extension and select the Sale Map, State, AGG(Profit Ratio), and username options (in that order!) for each drop down. Click submit to close the dialog window.
In the next chapter we’ll enable users to add an override from the Homepage form.