Chapter 2: Capturing Overrides
In the last chapter we configured our settings, and in this chapter we’ll start to use those settings to capture overrides for different values.
Add components to the Homepage
Let’s add the following components to the Homepage form:
A Button named
btn_submit, click event bound tobtn_submit_clickA Text Box named
text_box_overrideA Text Box named
text_box_comment
Once you’re done, the Homepage form should look like this:

And now let’s add the code:
 1from ._anvil_designer import HomepageTemplate
 2import anvil
 3
 4from trexjacket.api import get_dashboard
 5from trexjacket import dialogs
 6
 7class Homepage(HomepageTemplate):
 8  def __init__(self, **properties):
 9    self.dashboard = get_dashboard()
10    self.init_components(**properties)
11
12  @property
13  def worksheet(self):
14    # Here we use the settings we configured to dynamically get the worksheet
15    return self.dashboard.get_worksheet(self.dashboard.settings['worksheet'])
16
17  def btn_configure_click(self, **event_args):
18    dialogs.show_form('configure_form', width=900, height=900)
19    self.refresh_data_bindings()
20
21  def btn_submit_click(self, **event_args):
22    # If the user hasn't filled out the override and comment fields
23    # and if they haven't selected anything, return
24    if not all([
25      self.text_box_override.text,
26      self.text_box_comment.text,
27      self.worksheet.get_selected_marks()[0]
28    ]):
29      return
30
31    selected_record = self.worksheet.get_selected_marks()[0]
32    anvil.Notification('We should save this!').show()
33
34    # Reset our text boxes
35    self.text_box_comment.text = ''
36    self.text_box_override.text = None
Right now, if you click a mark, add an override, add a comment and click the Submit button, you should see a notification but nothing else!
Having trouble?
If you get an
IndexError: list index out of range, make sure to select a mark on the dashboard before hitting the submit button.If nothing happens when you click the submit button, double check and make sure you’ve bound the
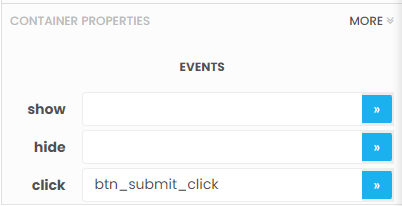
btn_submit_clickmethod to the Submit button’s “click” event. In the Design pane, click the submit button and scroll to the Properties section. You should seebtn_submit_clickin the text box to the right of “click”.
This works, but let’s start persisting this data using Anvil data tables.
Configure the data table
Let’s create a data table named overrides with the following columns:
id_field: Textid_value: Textoverride_field: Textoverride_value: Texton: Date and Timewho: Textcomment: Text
Make sure to select “Can search, edit and delete” next to permissions. We’d never do this in a production application but will for the tutorial.

Now let’s add a Data Grid component to the Homepage form with the following 4 column names and keys:
Name |
Key |
|---|---|
ID Field |
id_field |
ID Value |
id_value |
Override Field |
override_field |
Override Value |
override_value |
Now that we have our data table and UI set up, let’s save the user’s override and comment to our data table. Add the following code to the Homepage form:
 1from ._anvil_designer import HomepageTemplate
 2import anvil
 3from anvil.tables import app_tables
 4from datetime import datetime
 5
 6from trexjacket.api import get_dashboard
 7from trexjacket import dialogs
 8
 9class Homepage(HomepageTemplate):
10  def __init__(self, **properties):
11    self.dashboard = get_dashboard()
12    self.repeating_panel_1.items = app_tables.overrides.search()
13    self.init_components(**properties)
14
15  @property
16  def worksheet(self):
17    # Here we use the settings we configured to dynamically get the worksheet
18    return self.dashboard.get_worksheet(self.dashboard.settings['worksheet'])
19
20  def btn_configure_click(self, **event_args):
21    dialogs.show_form('configure_form', width=900, height=900)
22    self.refresh_data_bindings()
23
24  def btn_submit_click(self, **event_args):
25    # If the user hasn't filled out the override and comment fields
26    # and if they haven't selected anything, return
27    if not all([
28      self.text_box_override.text,
29      self.text_box_comment.text,
30      self.worksheet.get_selected_marks()[0]
31    ]):
32      return
33
34    selected_record = self.worksheet.get_selected_marks()[0]
35
36    app_tables.overrides.add_row(
37      id_value = selected_record[self.dashboard.settings['id_field']],
38      id_field = self.dashboard.settings['id_field'],
39      override_field = self.dashboard.settings['override_field'],
40      override_value = self.text_box_override.text,
41      who = selected_record[self.dashboard.settings['username']],
42      comment = self.text_box_comment.text,
43      on = datetime.now()
44    )
45    self.repeating_panel_1.items = app_tables.overrides.search()
46    anvil.Notification('Override saved!').show()
47
48    # Reset our text boxes
49    self.text_box_comment.text = ''
50    self.text_box_override.text = None
Now reload your extension in Tableau and you should be able to add a comment and an override!

In the next chapter we’ll connect Tableau directly to our data table so we can add the overrides to the dashboard tooltip.